Why You’ll Love this Southern Buttermilk Biscuits Recipe
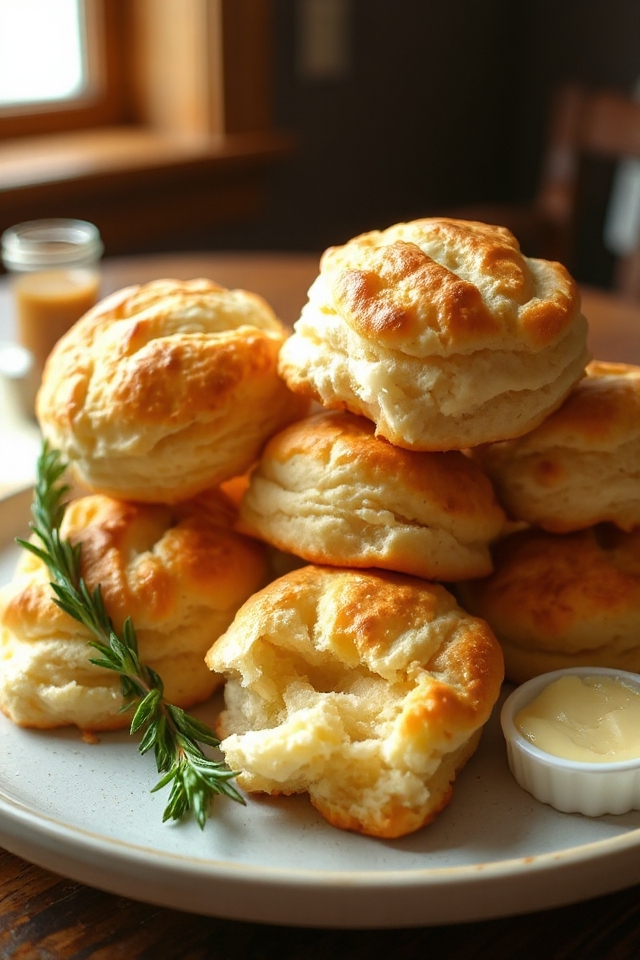
When you take your first bite of these Southern Buttermilk Biscuits, you’ll understand why they’re a cherished staple in Southern kitchens. The flaky layers practically melt in your mouth, offering a buttery richness that’s hard to resist.
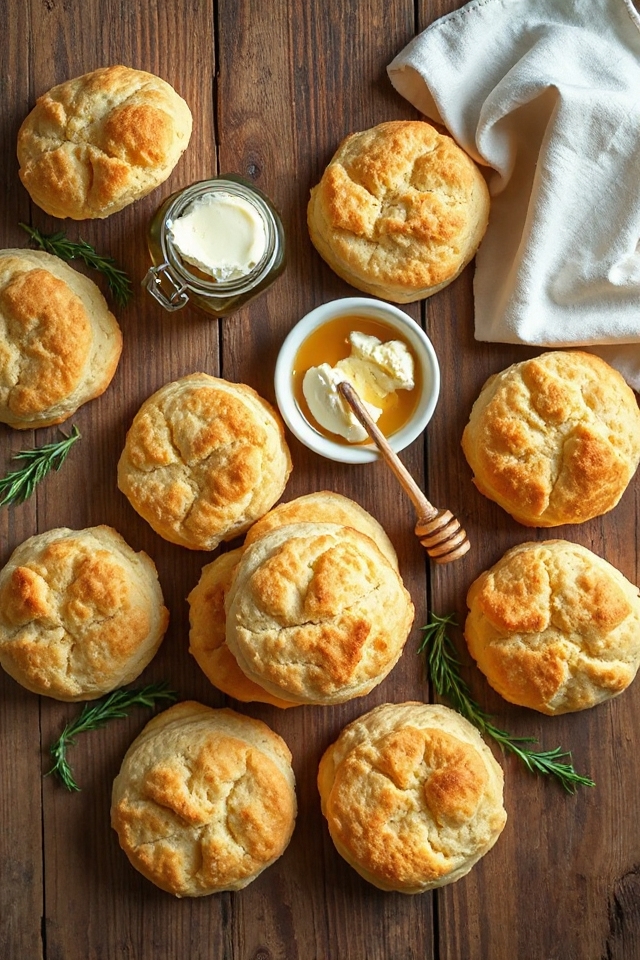
Each biscuit is golden brown, inviting you to enjoy them with jam or a drizzle of honey. I love how simple they’re to make, yet they impress everyone at the table.
Plus, they’re versatile enough to complement any meal—breakfast, lunch, or dinner. Trust me, once you try them, these biscuits will become a beloved part of your own kitchen traditions!
Ingredients of Southern Buttermilk Biscuits
When it comes to Southern Buttermilk Biscuits, the ingredients play a huge role in achieving that delightful flakiness and buttery goodness. You might be surprised by how few items you really need! But trust me, each one is essential for making those warm, melt-in-your-mouth biscuits that everyone loves.
They’re simple, but there’s a little magic in how they all come together. Let’s break it down, shall we?
Ingredients:
- 2 cups unbleached all-purpose flour (White Lily flour is preferred for extra fluffiness)
- 1/4 teaspoon baking soda
- 1 tablespoon baking powder (make sure it’s aluminum-free)
- 1 teaspoon kosher salt (or regular salt if that’s what you have)
- 6 tablespoons unsalted butter (very cold, because we want to keep that butter from melting)
- 1 cup buttermilk (approximately, depending on the dough consistency)
Now, let’s chat about these ingredients a bit. Choosing the right kind of flour can really make a difference. Have you ever heard of White Lily flour? It’s a Southern favorite and is often recommended for biscuits because it’s made from softer wheat, resulting in lighter, fluffier biscuits.
If you can’t find it, no worries; regular all-purpose flour works just fine too. And don’t skimp on the buttermilk! It’s what gives these biscuits that tangy flavor and tender crumb.
If you find your dough is feeling a bit dry, just add a splash more buttermilk. Remember, the goal is a wet dough that you can gently pat out. After all, nobody wants tough biscuits, right? Just keep that in mind while you gather your ingredients, and you’ll be on your way to biscuit bliss.
How to Make Southern Buttermilk Biscuits
Alright, let’s plunge into the heart of making those delightful Southern Buttermilk Biscuits. First things first, you want to preheat your oven to a toasty 450°F. This is vital because we need that heat to work its magic on our biscuits, helping them rise beautifully.
Now, grab a bowl or, for the adventurous souls, a food processor. Toss in those 2 cups of unbleached all-purpose flour, followed by 1/4 teaspoon of baking soda, 1 tablespoon of baking powder (just make sure it’s aluminum-free, okay?), and 1 teaspoon of kosher salt. Give it a little mix to combine everything.
Here’s where the fun begins—cut 6 tablespoons of very cold unsalted butter into chunks and add them to the flour mixture. If you’re using a food processor, pulse it a few times until the mixture resembles coarse meal. If you’re going old-school, just use a pastry cutter or your fingers to work the butter into the flour. Don’t worry if it’s a bit messy; the joy of cooking is in the chaos, right?
Once your butter is nicely incorporated, it’s time to add the star of the show—1 cup of buttermilk. Pour it in and mix it just until combined. And listen closely: if the dough is looking a bit dry, don’t hesitate to splash in a bit more buttermilk. The goal is to have a wet, sticky dough, so resist the urge to overmix.
Turn that dough out onto a floured board and gently pat it down until it’s about 1/2 inch thick. Remember, no rolling pins here; we want to keep it light and airy. Fold the dough about five times, then press it down to about an inch thick. Use a round cutter to cut out those biscuits, and if you’re like me and can’t resist a little extra, knead the scraps together gently for more biscuits, even if they won’t be quite as fluffy.
Place them on a cookie sheet—if you want soft sides, let them touch; if you prefer crusty sides, space them out an inch. Bake them for about 10-12 minutes, until they’re a lovely light golden brown. And whatever you do, don’t overbake them. Trust me, nobody wants a biscuit that’s more like a rock than a fluffy delight. Enjoy your biscuit-making adventure!
Southern Buttermilk Biscuits Substitutions & Variations
Southern Buttermilk Biscuits are incredibly versatile, allowing for a variety of substitutions and creative twists.
If you’re out of buttermilk, you can mix regular milk with a tablespoon of vinegar or lemon juice as a quick substitute. For a healthier option, try using whole wheat flour or a gluten-free blend.
Want to add flavor? Toss in some shredded cheese, herbs, or spices like garlic powder. I’ve even experimented with adding a bit of honey for a touch of sweetness.
These simple variations make it easy to customize your biscuits to suit any meal or craving!
What to Serve with Southern Buttermilk Biscuits
While biscuits can stand alone with their flaky goodness, pairing them with the right dishes elevates the experience even more. I love serving them with rich sausage gravy, which creates a comforting breakfast.
For lunch, they’re perfect alongside fried chicken or a hearty bowl of gumbo. If I’m in the mood for something lighter, I enjoy them with a fresh garden salad drizzled with vinaigrette.
And let’s not forget about jam or honey for a sweet touch! No matter what I choose, these biscuits always enhance my meal and leave everyone asking for more.
Additional Tips & Notes
To guarantee your biscuits turn out perfectly every time, I recommend measuring your ingredients carefully and keeping your butter as cold as possible.
If you can, use White Lily flour for even better results. Remember, handle the dough as little as possible to avoid tough biscuits—pat it out gently, rather than rolling it.
And if you want to prep ahead, cut the biscuits and freeze them; just bake them straight from the freezer when you’re ready.
Finally, keep an eye on your baking time; a beautiful light golden brown is what you’re aiming for. Trust me, you’ll love the results!