Why You’ll Love this Chocolate Buttermilk Pie Recipe
When you take your first bite of this Chocolate Buttermilk Pie, you’ll understand why it quickly becomes a favorite. The rich, chocolatey flavor dances on your taste buds, while the creamy texture keeps you craving more. It’s the perfect blend of sweet and slightly tangy from the buttermilk, making each slice a delightful surprise. Plus, it’s so simple to make that you’ll want to whip it up for every occasion. Whether it’s a family gathering or a quiet night at home, this pie has a way of bringing people together, creating memories one delicious bite at a time.
Ingredients of Chocolate Buttermilk Pie
When it comes to whipping up a delicious Chocolate Buttermilk Pie, the ingredients are pretty straightforward—thank goodness, right? This pie is all about that rich chocolate goodness combined with the smooth tang of buttermilk. If you’ve got a sweet tooth or just want to impress your friends and family, you’re in for a treat.
You’ll find that most of these ingredients are staples you might already have in your kitchen, which means you can get started without a last-minute grocery run (unless you’re like me, and somehow forget the most essential item). So let’s explore what you’ll need to create this delightful dessert.
Ingredients for Chocolate Buttermilk Pie:
- 1 1/2 cups semi-sweet chocolate chips
- 1 1/2 cups sugar
- 1/4 cup flour
- 1/2 teaspoon salt
- 6 eggs
- 1 cup buttermilk
- 1 1/2 tablespoons vanilla extract
- 1 (9 inch) deep dish pie shell
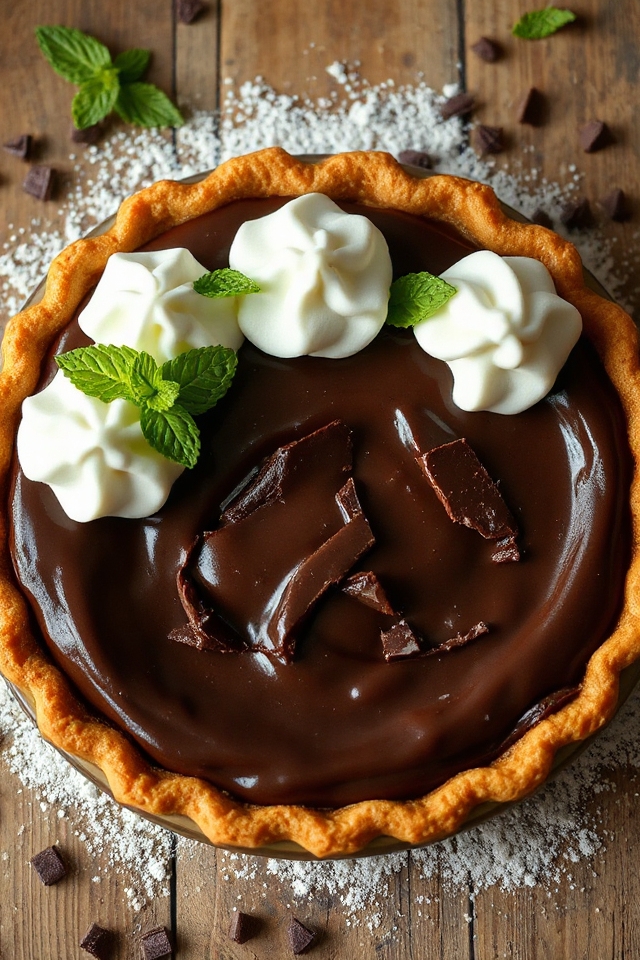
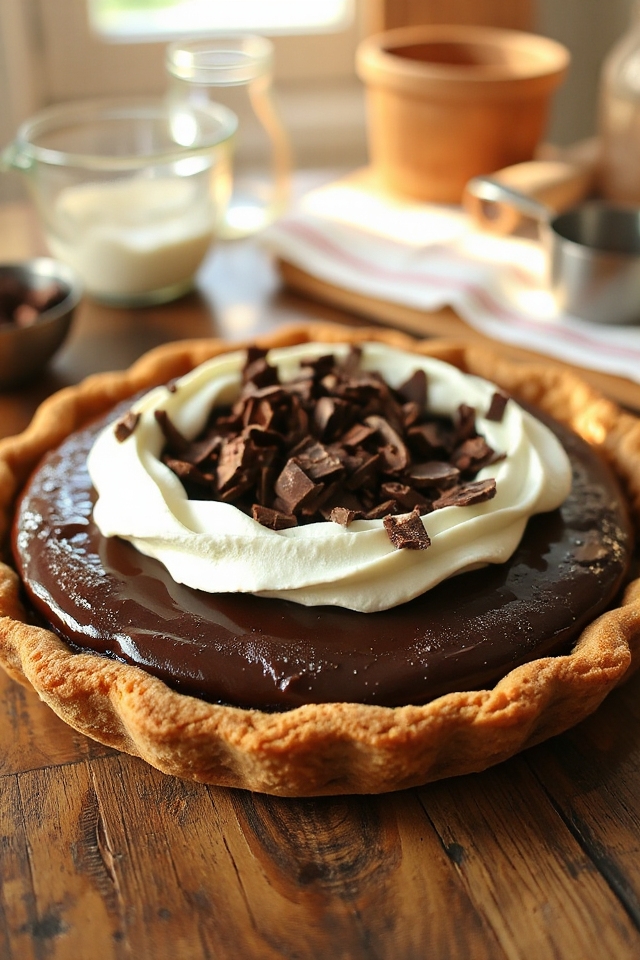
- Cool Whip, for garnish
Now, before you start mixing everything together, let’s chat about some of these ingredients. If you don’t have buttermilk on hand, don’t fret. You can easily make your own by mixing a tablespoon of vinegar or lemon juice with a cup of regular milk.
Just let it sit for about five minutes to thicken up and you’re good to go. Also, if you’re feeling adventurous, try using dark chocolate chips for an even richer taste.
And don’t skip the Cool Whip on top—it’s like the cherry on a sundae, adding a creamy finish that takes the pie to the next level. So gather your ingredients, and let’s get ready to make some magic happen in the kitchen.
How to Make Chocolate Buttermilk Pie
Let’s explore the delicious process of making this Chocolate Buttermilk Pie. It’s not as intimidating as it sounds, and trust me, your taste buds will thank you.
First off, grab 1 1/2 cups of semi-sweet chocolate chips because we need that rich chocolate flavor to shine. Melt the chocolate chips in a double boiler, stirring constantly over low heat until it’s nice and smooth. This is where the magic begins. Just keep an eye on it; you don’t want to burn your chocolate. I’ve learned that the hard way—nothing ruins a baking day faster than scorched chocolate, right?
While the chocolate is melting, let’s get our mixing bowls ready. In one bowl, whisk together 1 1/2 cups of sugar, 1/4 cup of flour, and 1/2 teaspoon of salt. This is the dry mix that will help balance the sweetness and create the pie’s structure.
In a separate bowl, crack open 6 eggs and add 1 cup of buttermilk along with 1 1/2 tablespoons of vanilla extract. Whisk it all together until it’s well combined and slightly frothy. This step always reminds me of making breakfast; it’s such a satisfying feeling to see the ingredients come together.
Now, pour the sugar mixture into the egg and buttermilk mix, and beat it with a mixer until everything is well combined. Once your chocolate is melted and slightly cooled, fold it into the mixture.
Now it’s time to pour this luscious batter into a 9-inch deep dish pie shell. If you have some leftover batter—don’t worry, I usually do—just save it for a mini pie or some fun little chocolate cups.
Place the pie on the middle rack of your preheated oven (325°F) and let it bake for about 1 hour and 15 minutes to 1 hour and 25 minutes. You want the top to look nice and crisp, and when you insert a knife into the center, it should come out with just a little bit of moist chocolate clinging to it. It’s all about that perfect balance.
Once baked, let it cool—refrigerate if you’re not eating it right away, or let it sit out for an hour before indulging. And don’t forget to top it with some Cool Whip for that creamy finish. It’s the little touches that make all the difference, right? Enjoy the process, and get ready to impress!
Chocolate Buttermilk Pie Substitutions & Variations
While I love the classic flavor of Chocolate Buttermilk Pie, experimenting with substitutions and variations can lead to delightful surprises.
You can swap semi-sweet chocolate chips for dark chocolate for a richer taste, or even white chocolate for a sweeter twist.
If you’re looking for a gluten-free option, try almond flour instead of regular flour.
For a hint of spice, add a teaspoon of espresso powder or cinnamon to the batter.
If you want a tangy kick, consider using Greek yogurt in place of buttermilk.
Each change adds a unique flair to this delicious dessert!
What to Serve with Chocolate Buttermilk Pie
Experimenting with variations of Chocolate Buttermilk Pie can enhance your dessert experience, but pairing it with the right accompaniments brings everything together.
I love serving it with a scoop of vanilla ice cream; the creaminess perfectly balances the rich chocolate. Fresh berries, like raspberries or strawberries, add a revitalizing tartness that complements the pie’s sweetness.
For a crunchy texture, consider crushed nuts or a sprinkle of toffee bits on top. If you want a touch of elegance, drizzle some chocolate sauce or caramel over the pie before serving.
These additions elevate the dessert and make it truly memorable!
Additional Tips & Notes
To guarantee your Chocolate Buttermilk Pie turns out perfectly, I recommend paying close attention to the baking time and temperature.
Every oven is different, so keep an eye on your pie as it bakes. If you notice the edges browning too quickly, consider covering them with foil to prevent burning.
Let the pie cool completely before slicing; this helps the filling set properly. For added flavor, try using high-quality chocolate chips.
Finally, don’t skip the Cool Whip garnish; it adds a delightful creaminess that complements the rich chocolate. Enjoy every bite of this delicious dessert!