Why You’ll Love this Chocolate Buttermilk Cake Recipe
When you take a bite of this Chocolate Buttermilk Cake, you’ll instantly understand why it’s a favorite. The rich, velvety texture melts in your mouth, balanced perfectly with a hint of tang from the buttermilk.
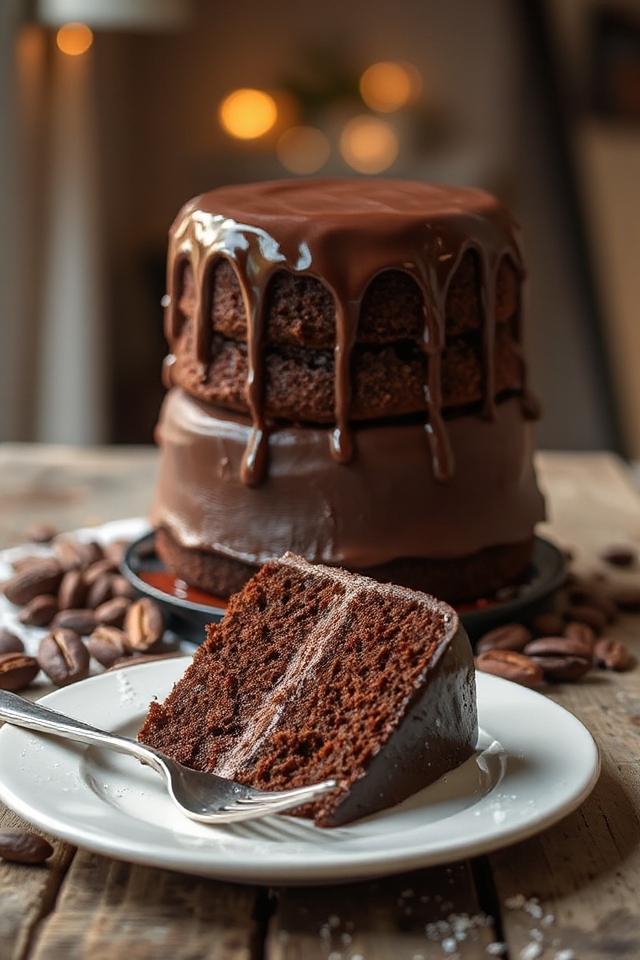
It’s incredibly moist, ensuring each slice is a delightful experience. I love how the deep chocolate flavor shines through, making it an ideal choice for any occasion.
Whether it’s a birthday or a simple family gathering, this cake never disappoints. Trust me, once you try it, you’ll be coming back for seconds—and maybe even thirds. It’s that good!
Ingredients of Chocolate Buttermilk Cake
When it comes to baking a delicious Chocolate Buttermilk Cake, the ingredients play a crucial role in creating that rich, indulgent flavor and moist texture we all love. Each element contributes uniquely to the overall taste and consistency of the cake.
So, let’s gather what we need to whip up this delightful dessert.
Here’s what you’ll need:
- 2 cups sifted all-purpose flour
- 1 1/2 teaspoons baking soda
- 1/4 teaspoon salt
- 1/4 teaspoon freshly grated nutmeg
- 4 ounces unsweetened chocolate
- 1 cup unsalted butter, at room temperature
- 1 3/4 cups sugar
- 4 large eggs
- 1 1/3 cups buttermilk
- 1 teaspoon vanilla
Now, a little note about the ingredients. If you don’t have buttermilk on hand, don’t worry—there are easy substitutes. Just mix a cup of milk with a tablespoon of white vinegar or lemon juice, and let it sit for about 5-10 minutes. Voila! Homemade buttermilk.
And when it comes to the chocolate, using unsweetened chocolate is key for that deep chocolate flavor. If you can, go for the high-quality stuff; it makes a difference. Trust me, your taste buds will thank you later.
How to Make Chocolate Buttermilk Cake
Making a Chocolate Buttermilk Cake is like starting a delightful journey—one filled with the sweet aroma of chocolate and the comforting feeling of home baking. Let’s get started by preheating your oven to a cozy 325°F (that’s 163°C for the metric folks out there).
While that’s warming up, grab two 9-inch layer pans. You know, the ones you always forget about until it’s time to bake? Spread a bit of solid shortening on the bottom and sides of those pans to guarantee your cake slides out like a dream. Dust them with unsweetened cocoa or flour—whatever you have on hand—then tap out the excess. This little trick will keep your cake from sticking and save you from a crumbly disaster.
Now, let’s mix our dry ingredients. In a bowl, sift together 2 cups of all-purpose flour, 1 ½ teaspoons of baking soda, ¼ teaspoon of salt, and ¼ teaspoon of freshly grated nutmeg. Nutmeg adds a lovely warmth to the cake; it’s like a hug in flavor form. Set that aside for a moment.
Next, it’s time for the chocolate. Melt 4 ounces of unsweetened chocolate in a double boiler—this is where you’ll feel like a fancy chocolatier. Once it’s smooth and velvety, take it off the heat and let it cool a bit.
Meanwhile, in a large mixing bowl, cream together 1 cup of unsalted butter (make sure it’s at room temperature; no one wants to wrestle with cold butter) and 1 ¾ cups of sugar until it’s light and fluffy, like a cloud. Add in 4 large eggs, one at a time, making sure to beat well after each addition.
Now comes the fun part—combining everything. Alternate adding your dry flour mixture with 1 ⅓ cups of buttermilk, starting and ending with the flour. This guarantees a nice, smooth batter without any lumps. Don’t forget to add 1 teaspoon of vanilla and that cooled chocolate when you’re done mixing.
Oh, and if you’re wondering if you can lick the bowl—yes, yes you can. Pour the batter into your prepared pans, and bake for 40-50 minutes for a sheet cake or 35-45 minutes for layers. Keep an eye on it, and don’t be afraid to do the toothpick test.
Once it’s baked to perfection, allow it to cool in the pans for about 10 minutes before transferring to a wire rack. You want that cake to cool completely before you get to the fun part—frosting and devouring it.
Chocolate Buttermilk Cake Substitutions & Variations
While I love the classic Chocolate Buttermilk Cake, there are plenty of substitutions and variations you can try to make it your own.
For a gluten-free option, substitute the all-purpose flour with a gluten-free blend. If you’re out of buttermilk, mix milk with a splash of vinegar or lemon juice.
Want to switch up the flavor? Incorporate espresso powder or almond extract for a unique twist. You can also add chocolate chips or nuts for extra texture.
Finally, experiment with different frostings, like cream cheese or caramel, to create a cake that’s truly personal and delightful.
What to Serve with Chocolate Buttermilk Cake
Serving up a slice of Chocolate Buttermilk Cake is a delight in itself, but pairing it with the right accompaniments can elevate the experience even more.
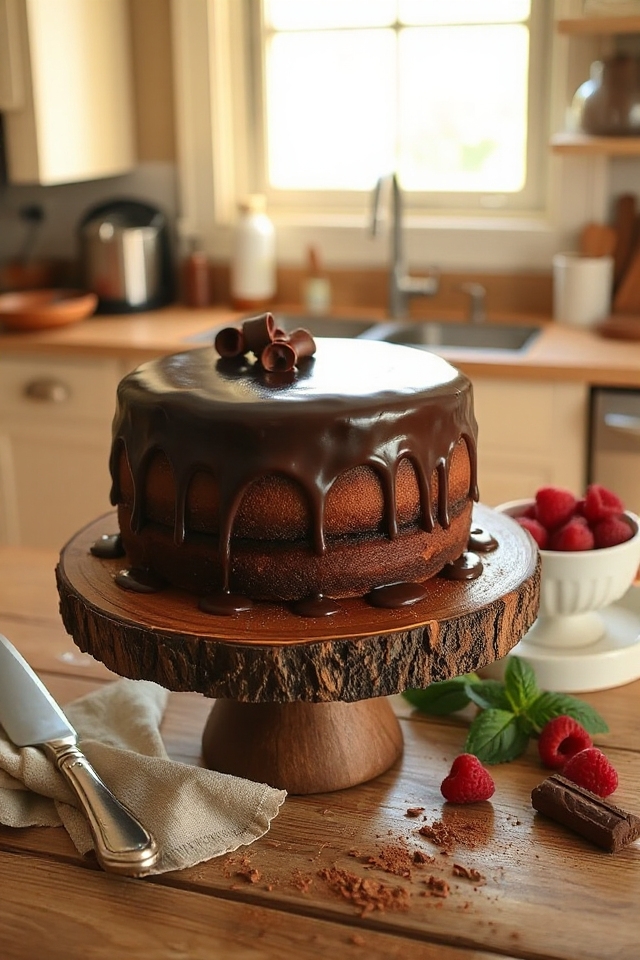
I love serving it with a dollop of whipped cream, which adds a light, airy touch. Fresh berries, like raspberries or strawberries, provide a burst of tartness that complements the rich chocolate.
For a more indulgent treat, a scoop of vanilla ice cream is perfect. If you’re feeling adventurous, drizzle a bit of espresso or chocolate sauce over the top.
Each of these options enhances the cake’s flavor, making every bite unforgettable!
Additional Tips & Notes
To guarantee your Chocolate Buttermilk Cake turns out perfectly, I recommend measuring your ingredients accurately and using room temperature butter and eggs for a smoother batter.
Don’t skip the cooling step for the melted chocolate; it helps prevent curdling when mixed with the eggs. If you want a richer flavor, consider adding a splash of brewed coffee to the batter.
For easy layer removal, use parchment paper on the bottom of your cake pans.
Finally, let the cake cool completely before frosting; this prevents the icing from melting. Enjoy every slice of your delicious creation!