Why You’ll Love this Buttermilk Rolls Recipe
When you take your first bite of these buttermilk rolls, you’ll understand why they quickly become a favorite at any meal. The soft, fluffy texture melts in your mouth, and the subtle tang from the buttermilk adds a delightful complexity.
I love how versatile they are, pairing perfectly with everything from soups to main courses. Whether you’re hosting a dinner or enjoying a quiet meal, these rolls elevate the experience.
Plus, the aroma wafting through your kitchen while they bake is simply irresistible. Trust me, once you try them, you’ll be hooked and craving these rolls again and again!
Ingredients of Buttermilk Rolls
When it comes to whipping up some delightful buttermilk rolls, the ingredients are what set the stage for success. Imagine this: you’re gathering everything you need, and it feels like you’re about to create magic in your kitchen. The smell of fresh bread, the warm, welcoming aroma that fills the house, it’s all about to happen.
Plus, you’ll be amazed at how simple and straightforward these ingredients are. Let’s take a look at what you’ll need to get started on this delicious journey.
Ingredients:
- 2 cups buttermilk (warmed to 100-110 degrees F)
- 2 packages dry yeast
- 1 package outdated old dry yeast (for flavor)
- 2 tablespoons sugar
- 2 teaspoons salt
- 1 teaspoon baking soda
- 1 teaspoon baking powder
- 3 tablespoons extra virgin olive oil (or vegetable shortening, if you must)
- 5-6 cups unbleached flour (or to taste)
- Shortening (for greasing baking sheets)
- Cornmeal (for dusting baking sheets)
Now, let’s think about some considerations regarding these ingredients. Buttermilk is the star of the show here, and it’s not just for pancakes, folks. Its tanginess brings a unique flavor and helps keep the rolls tender.
And about that outdated yeast – don’t worry; it’s like a fine wine. It adds depth and character to the rolls. Just make sure your yeast is still active by dissolving it in warm buttermilk; if it bubbles up, you’re golden.
The olive oil adds a richness, but if you’re out, vegetable shortening can step in—though it’s not quite as charming. Finally, don’t stress too much about the flour; start with five cups and add more until you get that perfect dough consistency.
Cooking is all about feeling it out, right? So roll up those sleeves, and let’s get baking!
How to Make Buttermilk Rolls
Making buttermilk rolls is like starting a delicious adventure in your kitchen, and trust me, it’s worth every moment. You’ll start by grabbing 2 cups of buttermilk and warming it up to a cozy 100-110 degrees F. This step is essential because it wakes up the yeast, so don’t skimp on it.
In your mixing bowl, sprinkle in 2 packages of dry yeast along with 2 tablespoons of sugar. Let that sit for a minute—it’s a bit like letting a good cup of coffee steep. Once it’s all cozy and bubbly, toss in 1 cup of flour and beat it until smooth. You want to see some action here; let that mixture foam up for about 5-10 minutes. It’s like the yeast is doing a little happy dance, and you want to encourage that energy.
Now, after your yeast has had its moment, it’s time to add some flavor. Mix in 2 teaspoons of salt, 1 teaspoon of baking soda, 1 teaspoon of baking powder, and 3 tablespoons of olive oil. Give it a good stir to combine everything, and then it’s flour time again! Gradually add in 3 more cups of flour, one cup at a time, mixing until you have a smooth dough.
If you’re using a mixer, switch to a dough hook now. As you knead, slowly introduce a fifth cup of flour, adding it 1/4 cup at a time. The dough will still be a bit sticky, which is perfectly fine. You’ll know you’re getting close when it starts to pull away from the bowl or your hands. Once you’ve reached that stage, pop the dough into an oiled bowl, cover it, and let it rise in a warm spot until it doubles in size—about 45 minutes.
After that, it’s time to punch down the dough (yes, you read that right, it’s quite therapeutic). Knead it for a minute, then divide it into pieces—about one ounce for mini rolls or two ounces for the larger ones. Roll them into smooth balls and place them on greased baking sheets dusted with cornmeal.
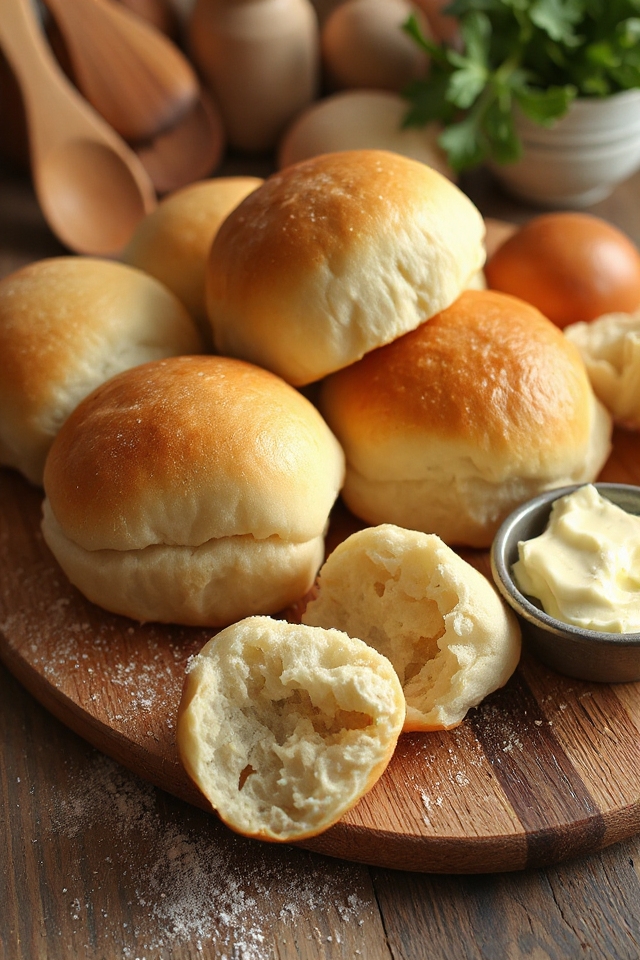
Now, give them another rise in a warm, draft-free spot for about 30-45 minutes. When they’ve puffed up nicely, preheat your oven to 400 degrees F and bake those beauties for 18-20 minutes. You’re looking for that light golden-brown color.
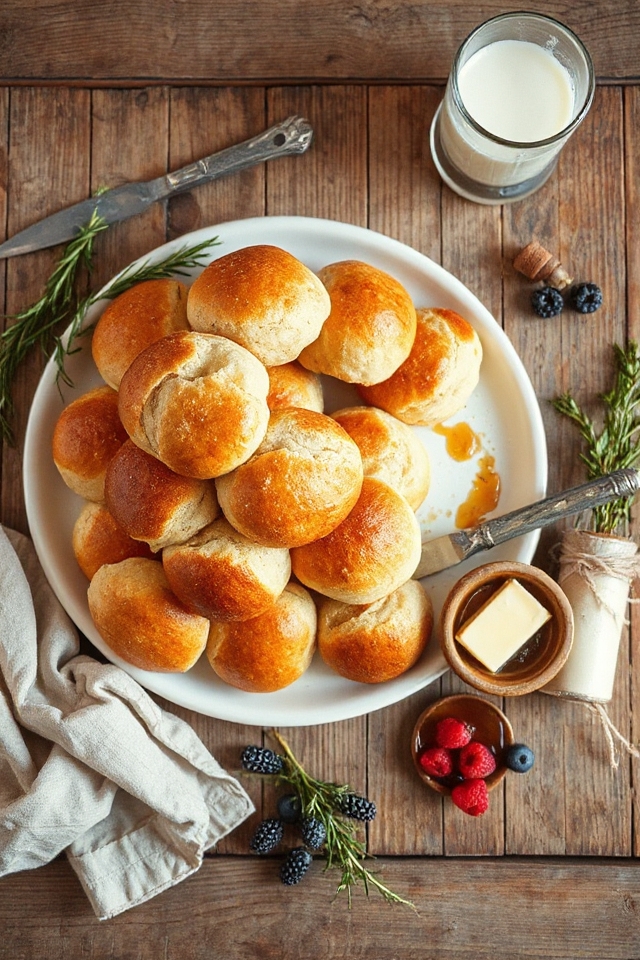
Once they’re out of the oven, let them cool a bit, or serve them warm right away. They’re perfect with just about anything—dinner, breakfast, or even a snack. And if you have any left over (not likely, but hey), you can freeze them for a rainy day. Just remember to reheat them gently, and you’ll be back in the buttermilk roll game in no time.
Buttermilk Rolls Substitutions & Variations
If you’re looking to switch things up with your buttermilk rolls, there are plenty of tasty substitutions and variations to explore.
For a richer flavor, try using sour cream or yogurt instead of buttermilk. If you want a bit of sweetness, add honey or maple syrup in place of sugar.
You can also incorporate herbs like rosemary or garlic for a savory twist. For a gluten-free option, use a gluten-free flour blend.
And if you’re feeling adventurous, mix in shredded cheese or diced jalapeños for a delightful kick. The possibilities are endless—get creative and enjoy your baking!
What to Serve with Buttermilk Rolls
Exploring different variations of buttermilk rolls can really enhance your baking experience, but knowing what to serve alongside them is just as important.
I love pairing these rolls with savory dishes like roasted chicken or beef stew; their soft texture complements hearty meals perfectly. You can also serve them with a rich, creamy soup, which creates a comforting combination.
For a lighter option, try them with a fresh salad drizzled with vinaigrette. And let’s not forget the joy of spreading butter or homemade jam on warm rolls—it’s simply irresistible!
Whatever you choose, buttermilk rolls are sure to elevate your meal.
Additional Tips & Notes
While preparing buttermilk rolls, I’ve found a few tips that can really make a difference in the outcome.
First, make sure your buttermilk is at the right temperature; too cold, and the yeast won’t activate properly.
I also recommend using a kitchen scale for measuring flour; it leads to better consistency.
When kneading, if the dough sticks too much, don’t hesitate to add a bit more flour gradually.
For a golden finish, brush the tops with melted butter right after baking.
Finally, don’t skip the second rise; it’s essential for fluffy rolls.
Trust me, these little tweaks make all the difference!