Why You’ll Love this Buttermilk Cherry Scones Recipe
When you take a bite of these Buttermilk Cherry Scones, you’ll instantly understand why they’re a favorite in my kitchen. The blend of tangy buttermilk and sweet cherries creates a delightful balance that keeps me coming back for more.
Each scone is tender yet substantial, making them perfect for breakfast or an afternoon treat. I love how easy they’re to whip up, too.
Plus, they fill my home with an irresistible aroma while baking. Trust me, once you try them, you’ll be hooked on their deliciousness and want to share them with everyone you know.
Ingredients of Buttermilk Cherry Scones
When it comes to baking up something delightful, these Buttermilk Cherry Scones are a true winner. The ingredients are simple, yet they come together to create something that feels special. You don’t need a ton of fancy kitchen gadgets or hard-to-find items; just some good ol’ staples and a bit of love.
Trust me, once you gather everything, you’ll be well on your way to whipping up a batch that’ll have everyone asking for the recipe. And who knows? You might even become the go-to scone expert in your circle.
Here’s what you’ll need to make these scrumptious scones:
- 3/4 cup low-fat buttermilk (chilled)
- 1/4 cup low-fat buttermilk
- 3 tablespoons egg whites
- 1/3 cup local wildflower honey
- 2 teaspoons vanilla extract
- 1/4 teaspoon almond extract
- 3 cups whole wheat flour
- 1 tablespoon baking powder
- 1/2 teaspoon baking soda
- 1/2 teaspoon sea salt
- 1/2 cup light margarine (cold and cut into bits)
- 3/4 cup dried sour cherries
- Ground cinnamon (to sprinkle)
Now, let’s chat a little about these ingredients. First off, if you can snag some local wildflower honey, do it. It adds a lovely depth of flavor that just can’t be beat, and you’ll feel like a true culinary hero.
Whole wheat flour gives the scones a hearty texture, making them more filling—because who wants to nibble on something that leaves you hungry?
And when it comes to the dried sour cherries, you can swap them for other dried fruits if you’re feeling adventurous, but the tartness of the sour cherries truly complements the sweetness of the honey.
How to Make Buttermilk Cherry Scones
Making Buttermilk Cherry Scones is a delightful experience, and it all starts with gathering your ingredients. Once you have everything in front of you, take a moment to appreciate the simplicity of it all.
You’ll begin by preheating your oven to 400°F because nothing says “let’s bake” like the warm embrace of a preheated oven. While that’s warming up, grab a mixing bowl and whisk together 3/4 cup of chilled low-fat buttermilk, 3 tablespoons of egg whites, 1/3 cup of local wildflower honey, 2 teaspoons of vanilla extract, and 1/4 teaspoon of almond extract. This mixture is where the magic begins; it’s sweet, fragrant, and oh-so-satisfying.
In another bowl, sift together 3 cups of whole wheat flour, 1 tablespoon of baking powder, 1/2 teaspoon of baking soda, and 1/2 teaspoon of sea salt. This is your dry mix, and it’s essential to guarantee everything is well blended.
Now, here comes the fun part: blending in 1/2 cup of cold light margarine cut into bits. You can use your fingers or a pastry cutter, but let’s be real; sometimes, getting your hands in there’s the best way to mix. Aim for a texture that resembles coarse crumbs.
Once you’re there, fold in 3/4 cup of dried sour cherries (or whatever dried fruit you fancy) and then pour in that lovely buttermilk mixture. Gently fold everything together with a rubber spatula until it’s just combined.
Now, we need to get a little hands-on. Turn the sticky dough out onto a floured surface and knead it gently for about 30 seconds. It’ll feel a bit like a sticky hug, but trust me, it’s worth it.
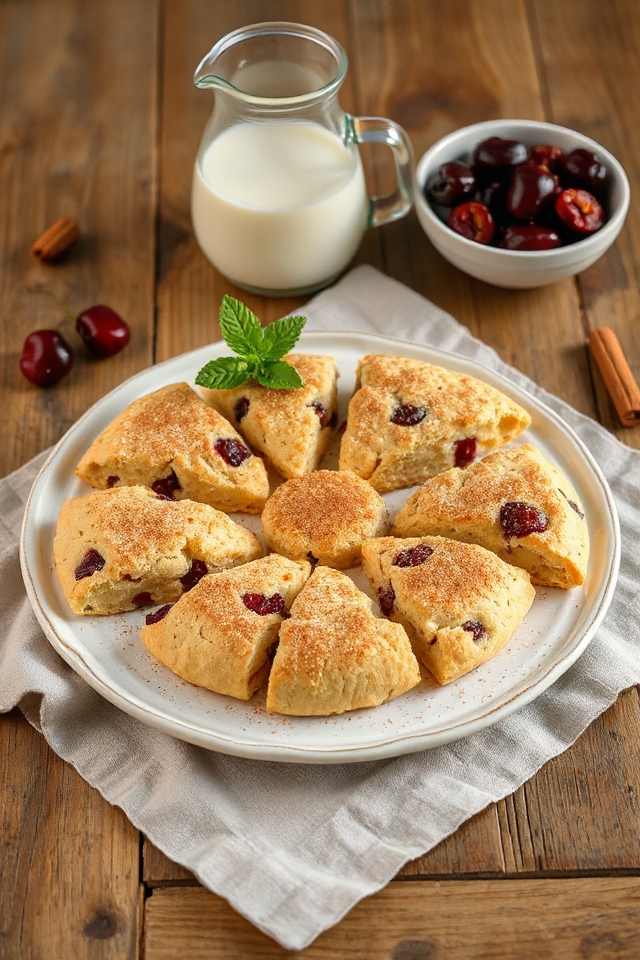
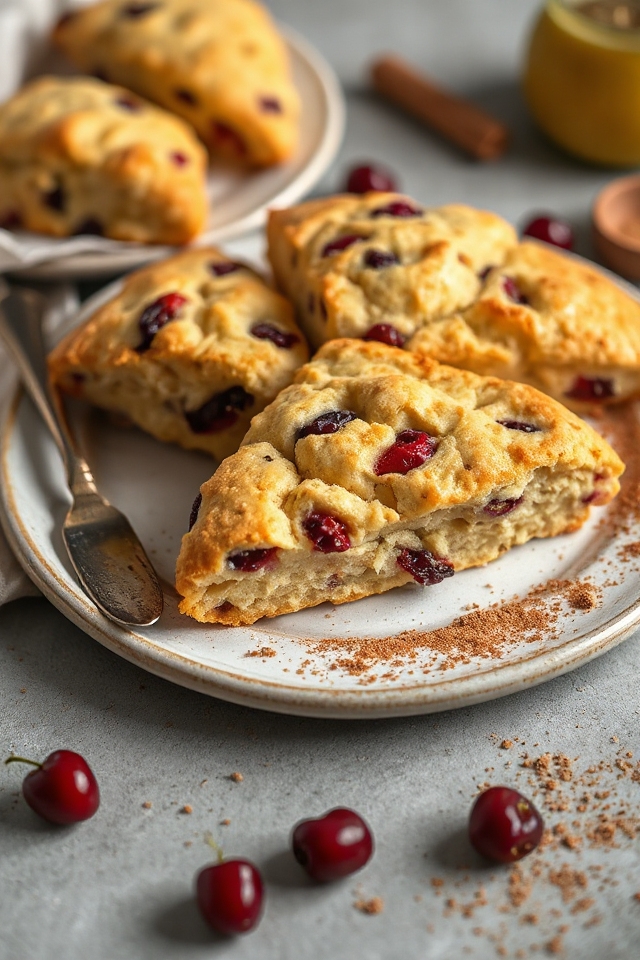
Form the dough into a 3/4-inch-thick round—don’t worry about perfection; this isn’t a beauty pageant. Use a floured sharp knife to cut it into 8 wedges and arrange them on an ungreased baking sheet.
Before they go into the oven, brush them with 1/4 cup of buttermilk and sprinkle some ground cinnamon on top for a little extra warmth. Bake those beauties for about 18 minutes, then turn off the heat and let them rest in the oven for 5 minutes.
When you pull them out, they should be golden and smelling heavenly. Enjoy the moment—you’ve just created something wonderful.
Buttermilk Cherry Scones Substitutions & Variations
Although I love the classic flavor of buttermilk cherry scones, there are plenty of substitutions and variations you can try to make this recipe your own.
For a twist, swap dried cherries for cranberries or blueberries. If you’re feeling adventurous, try adding a citrus zest for a revitalizing flavor.
You can also replace the whole wheat flour with almond flour for a gluten-free option. Instead of honey, maple syrup adds a unique sweetness.
Finally, experiment with different extracts, like lemon or coconut, to create your signature scone. The possibilities are endless—get creative and enjoy!
What to Serve with Buttermilk Cherry Scones
Serving buttermilk cherry scones can elevate your brunch or afternoon tea experience, especially when paired with the right accompaniments.
I love to serve them alongside clotted cream or a rich mascarpone, which adds a creamy contrast to the scones’ texture. A light drizzle of honey or a dollop of cherry jam enhances their fruity flavor beautifully.
For beverages, I recommend a steaming cup of Earl Grey tea or an invigorating glass of iced herbal tea. These pairings create a delightful balance, making each bite of the scone even more enjoyable.
Trust me; your guests will be impressed!
Additional Tips & Notes
To guarantee your buttermilk cherry scones turn out perfectly, pay attention to the temperature of your ingredients. Use cold margarine and chilled buttermilk for a flakier texture.
If you can, let the dough rest for a few minutes before shaping; it’ll make handling easier. Don’t over-knead—just gently bring it together.
I recommend using a sharp knife for cutting to ensure clean edges. For an extra touch, feel free to add a sprinkle of coarse sugar before baking for a sweet crunch.
Finally, keep an eye on the baking time; ovens can vary, and you want that golden-brown finish!